Table of Contents
Indoor mold is a pervasive issue in U.S. homes, and a lot of mold growth starts in the bathroom.
In fact, the results of one study of American homes showed that mold was present in 49 percent of people’s shower grouts and 50 percent of the walls above the shower.
Nobody wants to learn that they have mold growing in their bathroom, or anywhere in their house, frankly.
Unless you’re taking steps to create a waterproof bathroom in your home, though, there’s a good chance mold could start to grow and water damage could develop.
Read on for some tips on how to waterproof your bathroom to prevent mold, mildew, water damage, and more.
Importance of a Waterproof Bathroom
Waterproofing your bathroom can help to prevent leaks and moisture collection, both of which can lead to mold growth if you’re not careful.
Leaky pipes and faucets can also cost you a lot of money and cause your monthly water bill to skyrocket.
Water collection in the bathroom could also lead to serious structural damage throughout your home.
If you don’t take steps to keep your bathroom dry, you also increase the risk of someone slipping and falling when they use it.
Nobody wants to have to cling to the wall or countertop for dear life every time they walk into the bathroom after someone’s taken a shower.
10 Steps to a Waterproof Bathroom
Clearly, a waterproof home is important. How do you go about keeping out water damage, especially in areas like the bathroom?
Start by following these ten steps:
1. Check the Tiles
The majority of water damage that occurs in bathrooms starts in the shower or bathtub. Be sure to monitor these areas closely.
Examine the tiles on a regular basis to see if any of them are missing or cracked.
Check to make sure the grout is filled in and look for areas where it may be wearing down. If you notice any such areas, fill them in yourself to prevent leaks.
2. Dry the Floor
Do whatever you can to prevent water from collecting on the floor of your bathroom.
Put down bathmats to keep people from dripping water directly when they get out of the shower or bathtub.
If water overflows or drips onto the floor, dry it up promptly with a towel. Bathrooms are humid places, and it can take a while for the water to evaporate on its own.
3. Turn on the Fan
Be sure to turn on the exhaust fan in the bathroom after every shower or bath. This helps to dry things up a lot faster. Remember, humidity and condensation can cause just as much damage as actual pooled water.
4. Check Under the Sink
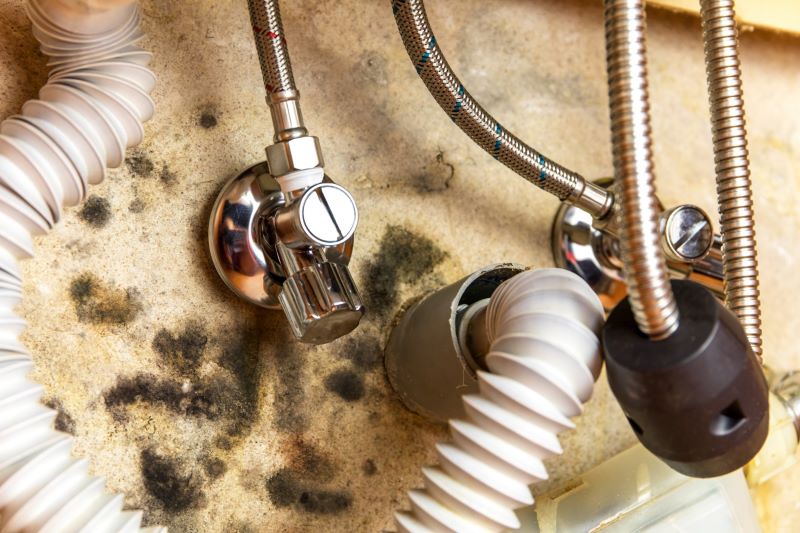
The pipes under the sink are another common source of moisture in bathrooms.
Many people don’t realize a leak has occurred until serious amounts of water have started pooling under the sink and spilling out.
Check under the sink on a regular basis to make sure the pipes are not leaking. If you notice any leaks, get them fixed promptly.
5. Monitor the Drain Speed
Monitor the speed with which your shower and sink drain.
If they seem to be sluggish, there’s a good chance you need to clean or unclog your drains.
This isn’t exactly a pleasant task, but it’s easy to do on your own and can prevent future leaks and a lot of potential water damage.
6. Update Your Water Fixtures
If it’s been a while since you updated the water fixtures in your bathroom, you may want to do that sooner rather than later. Updated water fixtures can help to reduce the risk of leaks. They can also help you cut down on your water usage, which helps to lower your water bills.
7. Don’t Overwork the Toilet
Don’t make the toilet work harder than is necessary.
Make sure children aren’t flushing anything down it that doesn’t belong there. Avoid flushing wipes, feminine hygiene products, or diapers down the toilet, too.
It’s a good idea to monitor the water level as well. A low water level could indicate a partial clog or a crack in the toilet bowl, both of which can lead to water damage.
8. Monitor Children in the Tub
This is important for child safety, of course, but it’s also important for preventing water damage in the bathroom.
If your children are splashing and sending water over the edges of the tub, dry it up as soon as you can.
In addition to reducing the risk of water damage and mold growth, this also protects your children (and you) from accidentally slipping and falling.
9. Check the Seals
Examine the seals around your shower head and faucet as well. Often, a worn out seal can be the source of leaks and water damage.
By monitoring these seals on a regular basis, you’ll be able to see more potential signs of leaks and fix them before they go on to cause serious moisture issues in your bathroom.
10. Inspect the Walls
Finally, be sure to pay attention to the walls and floors of your bathroom.
If you notice any signs of moisture or stains on the walls, call a plumber to see if there may be an issue with the pipes inside of those walls.
Pay attention to the walls in the rooms adjacent to your bathroom as well. Sometimes, water damage can show up there before you notice it in the actual bathroom.
Need More Home Improvement Advice?
Leaks, water damage, and mold growth are all irritating, unpleasant, and sometimes dangerous problems that no one wants to have to deal with.
If you follow these steps for a bathroom waterproofing, the chances that you’ll have to deal with them decrease dramatically.
Are you interested in learning more about improving your home and making sure it stays in good condition for as long as possible?
If so, head to the home improvement section of our site today.
You’ll find all kinds of articles here on everything from kitchen renovation to repairing your HVAC system.
