Table of Contents
I will assume that you are too excited to get into it and will dive into the important bits.
Before you bring out your sandpaper, it is imperative that you prep the area first. Adding to this, you should get your sanding paper and tools prior to the commencement of the project. I personally love having all three sanding papers in the order in which I will use them to avoid any confusion in the sanding order. Before proceeding below be sure to check out these best apps for carpenters that I recently found while researching about this topic.
Sanding order
Now, at this point, you are probably wondering what in the world sanding order is and why I go through the ordering trouble to ensure I follow it. Well, simply put, sanding order refers to the sequence of the varying grits you will use to get a perfect wood finish. Personally, I start with the 80 grit sandpaper on the rough spots and then proceed to the 120 grit and finally to the 180 grit paper to smoothen it all out. For softwoods, however, I use the 100, 150 and 220 grit sandpaper combinations.
Check the glue
At this point, I should insist that before you make any sanding stroke, you check on the glue. While finishing your wood, you will most likely come across it. There are times in which finishing the material before gluing is best. This way the glue can dry, and you can have an easier time peeling off the excess glue without getting in the way of your finishing process.
But in the event you cannot finish before gluing, you should check on the wood for any glue spots before staining and finishing since the glue spots will show right through the wood you are finishing.
So, how does one know when there is glue and when there isn’t? I mean when it has dried it is colorless and almost invisible. A trick I have learnt over the years is to shine a bright light on the wood surface and watch for imperfections brought out by the shiny glue surface. An even easier way is rubbing some mineral spirits before you sand. Glue on the wood surface will stick out like a sore thumb, and you can proceed to scrape it off.
Secrets to great sanding
The biggest problem with most DIY-ers when it comes to sanding is either overdoing it or not doing it enough. Now, one might think that to get this right you have to rely on your professional intuition. But on the contrary, it is far easier than that. Just pay attention to the sanding sequence. Every step is crucial and has a reason and getting too caught up using one sanding grit will affect the overall results.
1st pass
The rough grit sandpaper is essential in getting rid of machine marks and leveling the surface preparing it for the second sanding stage. When sanding with an 80 or 100 grit paper for the first pass, it is advisable to sand diagonally and across the grain.
‘What? I thought I should be sanding with the grain’ your mind is probably exploding at that statement. But yes, for the first pass, sanding with the grain is not as effective. Diagonal strokes are better suited to get rid of the rough spots and smoothen them faster. After getting the surface flat and all bad spots are gone, you can stop.
2nd pass
The objective of this pass is to get rid of stretch marks sustained in the first pass. As such, you do not need to spend much time here. Sand diagonally and in the opposite direction to the first pass and ensure that the new strokes take over the previous marks. Once you have new stroke marks all through the surface, proceed to the next sanding stage.
3rd pass
This is the last and arguably the easiest. In this stage, first, work to get rid of the stroke lines sustained in the previous sanding pass. Do this by sanding diagonally in the opposite direction. After, you can proceed to sand with the grain of the wood for a smooth and perfect finish.
Power sanders
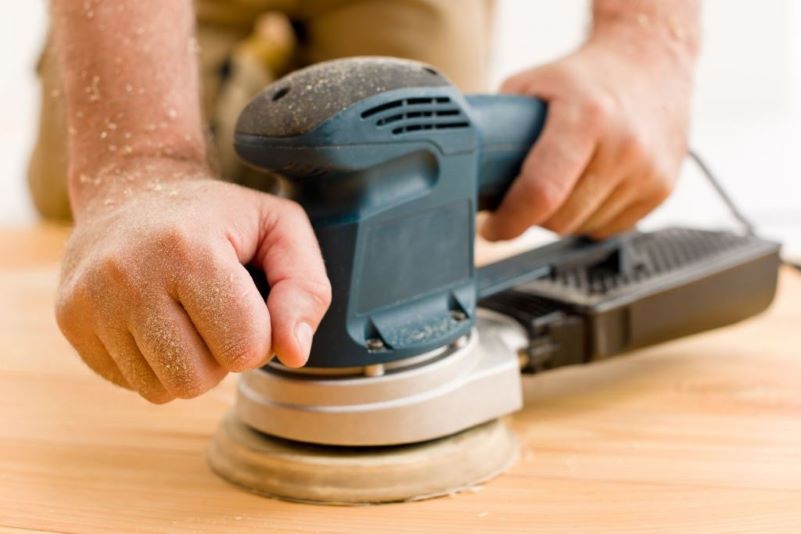
Sanding by hand can be hard and if you do it over and over, it can leave you with Popeye muscles. If you are not into such masculinity, getting a power sander will do you good. Just be sure not to bear down heavily on the unit and make quick passes. Going too slow will result in pigtails on the wood surface which can be rather unsightly.
The best way to work with a power sander is to let it do its work. Do not press down on it but instead let its natural weight do the trick. A perfect pace while sanding is to move the tool about an inch every second. Be sure to change the sandpaper from a low grit to a higher grit while you move from one sanding stage to the next.
If you do not have a power sander yet and would love to get the best one for the job, the Best Belt Sander Reviews – The Nutty DIY Guide will shed great insight on the best units available to choose from.
